✄ TRIMMING ✄
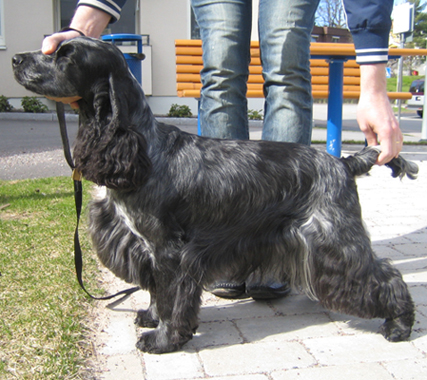
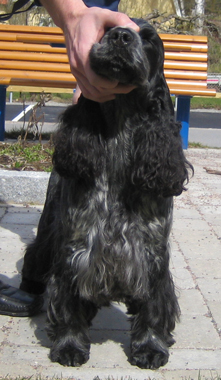
A beautifully trimmed Cocker is feast for your eyes! Here I will try to describe how to trim a Cocker correctly, leaving that long lasting natural look.
Contrary to what some of these so called »pros« claim, you cannot trim a Cocker in one hour - it's NOT possible!
Equipment/Tools
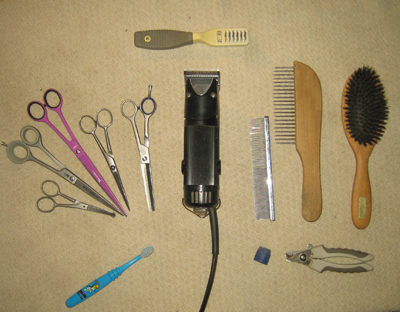 |
The necessary tools to keep your Cocker looking neat and tidy:
|
The Art of Handstripping
Handstripping is without doubt the best way to obtain a smooth, shiny coat
which will also stay this way and not alter the texture of the coat. Although it
is time consuming the result will be long lasting, which is why I recommend it
especially for pets. Since dead hairs
are removed from the hair follicle in the process, and not just cut, this will
stimulate new hair growth and rejuvinate the coat. Be kind to your fingers and
use rubber thimbles (which can be bought in Office supplies stores). Start by pushing the hair against the grain. Any long and woolly hairs will now be visible. Pinch a small tuft with finger and thumb and pull them out with the grain. Use your other hand to
keep the dog's skin stretched to avoid causing pain. Beware not to stay too
long in one place or you will end up with a bald spot. The aim is a smooth and
even finish. Remember: ALWAYS handstrip a dirty coat, never a squeaky clean one, as you will get a much better grip that way!
Head
Begin by stripping the head by hand, starting at the stop and working your
way back over the scull and down the sides towards the ears. Remember, you
want to take away all the fluff and long hairs, leaving a short-haired
smooth looking head. If the muzzle is very hairy, strip this too but be
careful not to pull out the whiskers (these are cut short with straight
scissors). Eyelashes and eyebrows are also removed using scissors pointed
away from the eyes and skin.
Ears
This part can be done either with electric clippers or thinning shears. The
former will be shown here. Use the #10 blade (or 3 mm setting). Start at the
fold on the side of the ear and clipper against the grain to just about
the point where the ear is attached to the skull. Do both the outside and
inside of the ear, paying extra attention to the ear canal as to not leave
any long hairs obstructing the air flow into the ear. Carefully thin the
transition clippered/handstripped with the thinning shears, placing them on
the skin, cut upwards once, move the shears, cut, move the shears etc all
the way round. Brush often to see where you need to go again.
Throat
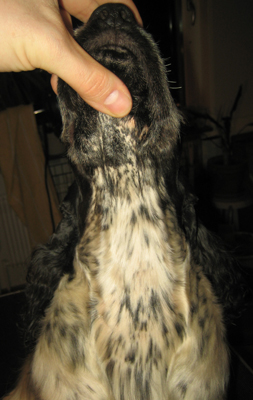
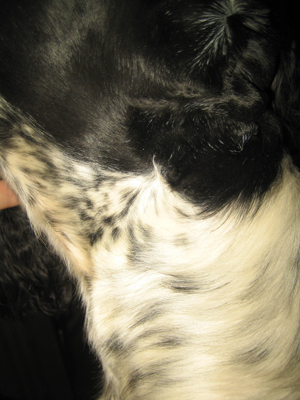
As with the ears, either electric clippers or thinning shears may be used.
Locate the sternum and start there. Staying within the »rosettes« (the
point where the hair turns in different directions), clipper against
the grain all the way to the chin. Clipper the area from just below the
cheek to the rosettes on the side of the neck (not beyond) with the grain. Pay extra attention
to the lipfolds, the hair here should be very short to avoid residue of food
getting stuck which will result in infections (and bad smells!). Using the
same technique as around the ears, thin the rosettes to make the transition
as smooth as possible.
Feet
Under construction ...
Frontlegs
Starting at the front of the leg, handstrip all the fluff and long hairs in the same manner described above. The front and outside of the leg, from the elbow and down
in a vertical line to the foot should be smooth, leaving the feathering on the back. This is NOT an area in which to use thinning shears, lack of bone should be improved by breeding
- not trimming! Thinning shears may be carefully used against the grain on the inside of the leg to thin the feathering.
Front

Once again, the rosettes are your landmarks. There should be feathering left on the inside of the rosettes,
covering the forechest and the outside should be smoothened using the thinning shears. Follow the upperarm going in an outwards and sometimes also downwards action
with the thinning shears. If the hair is very long, one could start by shortening it with the straight scissors.
If desired, finish the angle using a pair of small straight scissors, making sure only to cut a little at the time as to not leave any scissor marks. The feathering is
shaped using straight scissors. Start just in front of the frontlegs, holding the the scissors at the desired length of the feathering and cut inwards, move the scissors and cut
again keeping the desired length and shape of the feathering constantly moving outwards to the end. This will ensure a more natural look and if done correctly, the length will be
the same on both sides. A crictical eye is needed to see where you may need to go a second time.
Bum & Hindlegs
Under construction ...
Tail
Under construction ...
Hocks
Under construction ...